Host pool VM deployment
Warning: Nerdio Manager does not install the BgInfo Azure extension during any automation or management process. However, the BgInfo extension may be installed either through a scripted action directly, or unintentionally, as stated in the Azure PowerShell module issues report.
Nerdio Manager enables you to customize the way session host VMs are deployed in a host pool. This is a feature-rich facility that is detailed below.
To configure host pool VM deployment:
-
Locate the host pool you wish to work with.
-
From the action menu, select Properties > VM Deployment.
-
Enter the following information:.
-
Set time zone: Select this option, and from the drop-down list select the time zone, to set the time zone on the VM when it is provisioned.
-
Enable time zone redirection: Select this option to allow users to see their local device's time zone inside of their session.
-
Enable Accelerated Networking for VMs that support it: Select this option to enable Accelerated Networking, if available.
Note: The Azure VM accelerated networking feature is available in some of the larger Azure VMs. This feature is useful for enterprise organizations and IT professionals who need to deploy, manage, and optimize large amounts of Azure Virtual Desktops. It speeds up networking performance of individual VMs.
If this feature is not supported on your Azure VM, it is not enabled. See this Microsoft document for more information.
-
Enable NVMe for VMs that support it: Select this option to enable NVMe, if available.
Note: NVMe is a storage protocol that offers higher IOPs and throughput providing your workload with overall greater performance. See this Microsoft document for more information.
-
Install GPU drivers on supported VM sizes: Select this option to install either NVidia or AMD drivers.
Note: GPU drivers can be installed on N-series VMs.
-
Distribute VMs across Availability Zones: Select this option to automatically distribute newly created or re-imaged session host VMs across Availability Zones in the selected Azure region.
Note: See this Microsoft article for more details about Azure Regions and Availability Zones.
-
Place VMs on Dedicated Hosts: Select this option to place the VMs to physical servers.
Note: See this Microsoft article for more details about Azure dedicated hosts.
-
Dedicated Host Group: From the drop-down list, select the dedicated host group.
-
Dedicated Host: From the drop-down list, select the dedicated host for the VMs.
Note: If Automatic assignment is selected, the VMs are automatically assigned to the appropriate hosts when powered on.
-
-
Place VMs in Capacity Reservation Groups: Select this option to place the VMs in a capacity reservation group.
Note: See Manage Capacity Reservations Groups for full details.
-
Capacity Reservation Groups: From the drop-down list, select the capacity reservation group(s).
-
-
Deallocate powered off but not deallocated VMs: Select this option to have a periodic task check if any session host VMs are in a powered off (but not deallocated) state and automatically deallocate them to save on Azure compute costs.
-
Install App Attach certificates: Select this option to install all stored certificates if the App Attach packages are added to this host pool.
-
Install Applications: Select this option to install applications configured by recurrent UAM policies before moving the host out of drain mode.
-
Restart VM after deployment: Select this option to restart the VM after it is created.
Note: If certain extensions are installed during deployment (FSLogix, Sepago, Virtual Desktop Optimizations, or User Sessions Time Limits), the VM is automatically rebooted even if this option is not selected.
-
Always prompt for password: Select this option to always prompt the user for a password.
Note: This policy setting specifies whether Remote Desktop Services always prompts the client for a password upon connection. You can use this setting to enforce a password prompt for users signing in to Remote Desktop Services, even if they already provided the password in the Remote Desktop Connection client.
By default, Remote Desktop Services allows users to automatically sign in by entering a password in the Remote Desktop Connection client.
-
If you select this option, users cannot automatically sign in to Remote Desktop Services by supplying their passwords in the Remote Desktop Connection client. They are prompted for a password to sign in.
-
If you do not select this option, users can always sign in to Remote Desktop Services automatically by supplying their passwords in the Remote Desktop Connection client.
-
-
Enable H.265 encoding on supported VM sizes: Select this option to enable high efficiency video coding (H.265) hardware acceleration on VM sizes of N-series with NVIDIA GPU.
Note: Multimedia redirection isn't supported. Disable it on your session hosts by uninstalling the host component
-
Enable encryption at host: Select this option so that data stored on the session host VMs is encrypted at rest and flows encrypted to the Storage service.
Notes:
-
This setting only applies to newly created desktops.
-
Encryption sets are per subscription/region. You can create hosts in different subscriptions/regions, and based on the host's subscription/region we select the appropriate encryption set.
-
See this Microsoft article to learn more about the encryption at host feature.
-
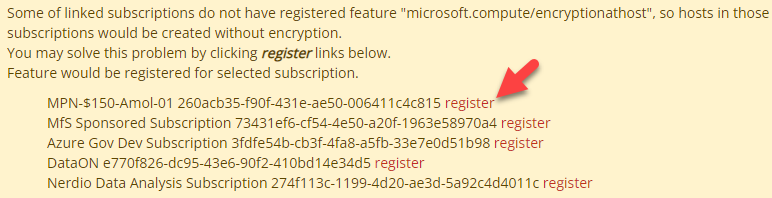
Register: If necessary, select this option to register the feature "microsoft.compute/encryptionathost" with the linked subscriptions that do not have this feature.
Notes:
-
Nerdio Manager supports the use of both platform-managed keys (default) and customer-managed keys (Encryption Sets). If you are using Encryption Sets, these must be created in the same region as the target session host VMs.
-
If this subscription was registered in Nerdio Manager using the "logged in user" option, you must use an account with Subscription Owner permissions to register these features.
-
If this feature is not registered, hosts in the linked subscriptions would not have encrypted data.
-
This is a sample pop-up warning message:
-
-
-
Enable boot diagnostics: Select this option to apply the Boot Diagnostics feature to desktops in this pool.
Note: This setting only applies to newly created desktops.
-
Storage accounts for boot data: Optionality, from the drop-down list, select an available storage account to be used to store boot data.
Note: By default, Azure uses an automatic managed storage account for screen shots and other data. To use the default setting, leave this empty.
-
-
Enable watermarking: Select this option to enable watermarking.
Note: Watermarking helps prevent sensitive information from being captured on client endpoints. When you enable watermarking, QR code watermarks appear as part of the remote desktops. The QR code contains the connection ID of a remote session that admins can use to trace the session.
-
Scale: Select the scale, which is the size in pixels of each QR code dot. This value determines the number of squares per dot in the QR code.
-
Opacity: Select the opacity, which is how transparent the watermark is, in percent, where 0 is fully transparent.
-
Width factor: Select the width factor which determines the distance between the QR codes in percent. When combined with the height factor, a value of 0 would make the QR codes appear side-by-side and fill the entire screen.
-
Height factor: Select the scale, which determines the distance between the QR codes in percent. When combined with the width factor, a value of 0 would make the QR codes appear side-by-side and fill the entire screen.
-
-
Enable Hibernation: Select this option to save time and money by deallocating your virtual machine and saving the contents of its RAM to the root volume, allowing you to resume from where you left off when your VM restarts.
-
Patch Orchestration Options: From the drop-down list, select the patch orchestration option, which allows you to control how patches are applied to your virtual machine.
-
Security Type: From the drop-down list, select the security type.
Note: Security type refers to the different security features available for a virtual machine. Security features like Trusted Launch and Confidential virtual machines improve the security of Gen2 VMs. However, additional security features have some limitations, which include not supporting back up, managed disks, and ephemeral OS disks.
-
Secure Boot: Select this option to enable Secure Boot, which helps protect your VMs against boot kits, rootkits, and kernel-level malware.
-
vTPM: Select this option to enable Virtual Trusted Platform Module (vTPM), which is TPM 2.0 compliant and validates your VM boot integrity apart from securely storing keys and secrets.
-
Integrity Monitoring: Select this option to enable cryptographic attestation and verification of VM boot integrity along with monitoring alerts if the VM didn't boot because the attestation failed with the defined baseline.
-
Entra ID group(s): From the drop-down list, select the default Entra ID group(s) to add the session hosts to.
-
Enforce Intune Compliance : Select this option to make hosts unavailable to users until the Intune compliance requirements are met.
Note: You may select that all Intune policies are met or only compliance policies are met. In addition, enabling this feature may result in significant increase in provisioning time, depending on the configured Intune compliance requirements.
-
Allow non-admin users to shadow sessions: Toggle on this option to enable selected non-admin users or groups to shadow sessions.
Note: Session shadowing is only available with multi-session versions of Windows OS. This feature does not work with Windows 10 Enterprise (single session).
-
User or Group Name: From the drop-down list, select the users or groups to allow to shadow sessions.
-
-
Run scripted actions when...: Toggle on the desired run script options.
For each option, enter the following information:
-
Script: From the drop-down list, select the scripts to execute.
Note: You can select both Windows scripts and Azure Runbooks. In addition, you can drag and drop the scripts to change the order in which they are run.
-
Scripted actions input parameters: If necessary, provide the required parameters.
-
Pass AD credentials: Select this option to pass AD credentials.
-
AD Credentials: From the drop-down list, select the AD credentials to pass.
-
-
-
Once you have entered all the desired information, select Save or Save & close.